SilverState55: Custom & Collectible Football Helmets & Minihelmets


Display Helmet Refurbishing, Step 1: Planning and Considerations
Back to Display Helmet Refurbishing FAQ Helmets
 
**NOTE: This information is provided solely for private collection purposes ONLY.  THIS SITE DOES NOT SELL REFURBISHED FOOTBALL HELMETS, USED FOOTBALL HELMETS, NOR DO WE RECONDITION FOOTBALL HELMETS.  If you need football helmets reconditioned, please contact your appropriate supplier or manufacturer's representative**


SilverState55.com assumes NO liability for incorrect use of any football helmet.  All helmets subject to the steps listed below are for DISPLAY PURPOSES ONLY.  DO NOT USE ANY FOOTBALL HELMET FOR ANY OTHER PURPOSE(S) THAN DISPLAY IF YOU SUBJECT IT TO THESE INSTRUCTIONS.  Read and follow any written instructions that accompany any helmet before using.

Rather buy a new football helmet instead?
Free Shipping on all orders over $99 FootballAmerica.com

Many of the helmets I obtain to refurbish myself have been recertified at least once, and are probably at the end of their useful lives.  No matter where you obtain these from, if you need to refurbish it yourself or simply apply a new coat of paint, I hope that these tips are of use.


First off, a precaution: if you sand or file a helmet shell, you are removing parts of the shell and will automatically void the warranty.  DO NOT USE THE HELMET FOR ANYTHING OTHER THAN A DISPLAY MODEL!  Some helmet manufacturers claim that simply applying spray paint to a helmet can cause it to become brittle; obviously by sanding/filing a helmet shell you are making the shell weaker.  So do not use it for anything other than display purposes only, in order 
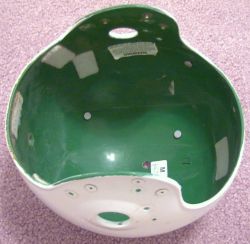
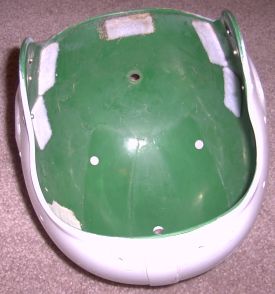
to properly protect yourself.  To avoid any confusion with SilverState55.com's shells, since they will only be used for display, NOCSAE certification molding on the rear of the shell is sanded off and all labels but the sizing label inside are removed.  Once this is done, it is recommended that you DO NOT SELL, GIVE, OR TRADE this helmet to anyone, to avoid any potential misuse of the helmet (and potential liability on your part).  There are plenty of wannabe rocket scientists out there who are all too willing to misuse a display helmet, especially if they've been loading up on "liquid courage" or "hero juice" (insert alcoholic beverage of choice).  Be sure to protect yourself, don't let these helmets get loose once you start to refurbish them according to these steps.


With that said, let's get busy!


Be sure to strip down the helmet, removing the facemask, cheekpads, snaps, screws, and all inner pads and liners.  On a Riddell helmet with air bladders, be sure to remove the plastic plug from the outside of the helmet, and then gently remove the bladder/pads from the inside.  I usually don't worry if I'm going to tear the bladders as these helmets are going to be used for display only anyway.


Once the shell is stripped down, remove all labels, stickers, and decals.  Various methods can be used, but I usually employ an Xacto knife with a chisel blade to remove these.  For exterior decals, use a hair dryer to heat the decal and peel it off.  For residual adhesive, use either a Brillo or SOS pad to scrub off the adhesive, or steel wool with hand cleaner.  3M makes an excellent adhesive remover that won't damage most painted surfaces, available from most autobody supply shops.


I use either a Brillo or SOS pad with soap to scrub out the inside of the shell.  Most of the used helmets I've obtained have not been thoroughly cleaned, so this is the time to do it.  Plus, the steel wool pad will rough up the plastic surface, allowing the primer at a later stage to get a good grip on the inner surface.


Notice some things about this helmet: it has been painted at least once before (since it's a nice lacquer, it was probably done as a recertification procedure) and it uses both Velcro and plastic pins to mount the inner pads.  Riddell shells usually have various combinations of these, so be careful not to damage them unless you plan on replacing them.


I've also had to drill out (extract) various screws on facemask clips and chinstrap snaps that have become so rusted/corroded that they could not otherwise be removed.  If you need to do this, be careful and use the appropriate safety equipment.


On to Step 2