SilverState55: Custom & Collectible Football Helmets & Minihelmets


Display Helmet Refurbishing, Step 5: Painting
Back to Step 4 FAQ Helmets
 
**NOTE: This information is provided solely for private collection purposes ONLY.  THIS SITE DOES NOT SELL REFURBISHED FOOTBALL HELMETS, USED FOOTBALL HELMETS, NOR DO WE RECONDITION FOOTBALL HELMETS.  If you need football helmets reconditioned, please contact your appropriate supplier or manufacturer's representative**


SilverState55.com assumes NO liability for incorrect use of any football helmet.  All helmets subject to the steps listed below are for DISPLAY PURPOSES ONLY.  DO NOT USE ANY FOOTBALL HELMET FOR ANY OTHER PURPOSE(S) THAN DISPLAY IF YOU SUBJECT IT TO THESE INSTRUCTIONS.  Read and follow any written instructions that accompany any helmet before using.

Rather buy a new football helmet instead?
Free Shipping on all orders over $99 FootballAmerica.com

Select your paint type


I use spray enamels simply out of convenience.  Lacquers can give more of a superior shine than do enamels, dry/cure much faster than enamels, all with thinner coats possible and less chance of orange-peel.  Enamels take some time to properly and thoroughly cure once painted, and times between coats differ between not only paint types but type of brands.  It can take anywhere from one week to one month for the enamel paint to fully cure before you start to color-sand and polish.

For custom colors, try an automotive paint-supply shop; you can have them mix any shade of color you want in either lacquer or urethane, and can be mixed into spray cans or a tin.  However, the minimum quantity is usually a pint, and prices generally start at $35/pint on up.  Typically, these paints MUST be sprayed on.  You can use a PreVal sprayer with propellant can for this and get great results.


Several collectors have told me that they have had excellent results after spraying lacquer color coats, and sealing it with a lacquer clear coat WITHOUT going through the sanding/polishing process; if it works for you, great!.  However,I live in a very arid climate, so many times the paint begins to dry before it even hits the helmet shell!  So I almost inevitably have to color sand every finish that I apply.  But if you don't need to color-sand, and can get a good, smooth finish straight from the can, then apply your decals and enjoy your good fortune! 

Warm the Paint


Place the can of paint in a bowl of hot tap water.  Again, like with the priming stage and in case you forgot, DO NOT PLACE THE CAN IN BOILING WATER!!  Use hot TAP water only!  Leave the can in the hot water for several minutes to ensure that it is thoroughly warmed.  Shake it for several minutes to mix everything up good.  On a warm, sunny day, you could also place the can in the sun for several minutes to heat it up as well (it sure works good in the desert summers here in Las Vegas!!).


Apply the paint


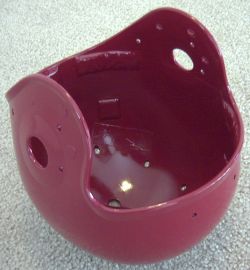
Paint the interior of the shell, and the edges.  Also be sure to paint the details that you may not be able to reach when you turn it over to paint the exterior.  Make sure that the paint is dry to the touch before you 
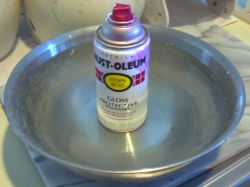
turn it over to paint the exterior.  Typically, I use a tall can of spray paint to prop the helmet shell on while painting the exterior, or you could use a coat hanger to suspend the shell.  Apply several coats, at least 3; 
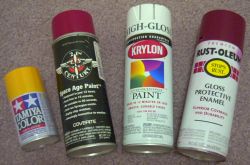
be sure to use the same paint brand for color coats (you may need more than one can), and be familiar with that paint brand's recoat times.  Typically, enamels require you to recoat within 1-2 hours, depending upon environment and temperature.  If you get fingerprints or dust particles in the color coats, don't fret; keep spraying!  We'll correct these later.

Once you're done with applying your paint coats, set the shell aside for at least a week for the paint to cure; some paint brands require up to one month to fully de-gas and cure to a point that will allow you to color-sand without damaging the painted surface.  Yes, it's a long time, but I have several shells going on at a time, so I have plenty to work on while I'm waiting for one shell to cure.


On to Step 6