SilverState55: Custom & Collectible Football Helmets & Minihelmets


Display Helmet Refurbishing, Step 4: Prime the Shell
Back to Step 3 FAQ Helmets
 
**NOTE: This information is provided solely for private collection purposes ONLY.  THIS SITE DOES NOT SELL REFURBISHED FOOTBALL HELMETS, USED FOOTBALL HELMETS, NOR DO WE RECONDITION FOOTBALL HELMETS.  If you need football helmets reconditioned, please contact your appropriate supplier or manufacturer's representative**


SilverState55.com assumes NO liability for incorrect use of any football helmet.  All helmets subject to the steps listed below are for DISPLAY PURPOSES ONLY.  DO NOT USE ANY FOOTBALL HELMET FOR ANY OTHER PURPOSE(S) THAN DISPLAY IF YOU SUBJECT IT TO THESE INSTRUCTIONS.  Read and follow any written instructions that accompany any helmet before using.

Rather buy a new football helmet instead?
Free Shipping on all orders over $99 FootballAmerica.com

Prep the helmet before priming


After washing off the helmet and allowing it to dry thoroughly, use masking tape to mask off details that you do not want painted or primed.  Typically I leave only the size label inside the helmet for my own use, so I'll mask this off.  I also mask off all Velcro so it can be reused later to remount the pads.  I like to mask off the cheekpad rivets on the inside and outside of the helmet; I feel that when they're bare after painting that this represents more of an "original" look.  I just don't like the look of painted rivets, but that's my choice and so I mask them off.


CHOICE OF PRIMER TYPE

Enamel or Lacquer?

Regular or Hobby-Store Cans?


This is totally up to you. Enamels are the most common type of spray primers (and paints) and are widely availabe; they are also fairly inexpensive.  Enamel primers are fairly forgiving and are best for general uses.  They can also be used under most lacquer spray paints, as long as you allow the enamel primer coat(s) to properly cure for at least a week.  Why a week?  Because the enamel composition is such that it takes about this time to properly cure and harden.  If you are spraying enamel colors over the enamel primer, then typcially you only need to wait about 2 days before applying your enamel color coats.  This time allows the enamel coats to properly "de-gas" and cure.

Lacquers are more expensive than enamels, but offer a couple of advantages.  They dry quickly and allow you to recoat whenver you want without the restrictions of enamels; lacquer primers also cover an area with a thinner coat than enamels.  However, lacquer primers are difficult to find; the only ones I've been able to discover are custom-mixed jobs from auto body & paint supply shops, or at hobby shops.

Hobby shops usually carry a wide assortment of paint types, brands, and colors.  I've never found a difference between brands, just between types (enamels vs. lacquers).  Most hobby spray paints are identical to their larger cousins you will find in hardware & auto stores.  I've used hobby spray paints on helmet shells with no difference in method or technique as compared to the larger cans...they all end up with the same results.  Just keep in mind that it will take more than one hobby spray can to coat a full-size helmet, and you could end up paying more for several hobby spray cans than by just buying one inexpensive can of primer.  The choice is totally up to you.


Heat the Primer/Paint


Place your can of primer in a pan or bowl and run hot tap water over it until it is warm.  DO NOT USE BOILING WATER!!!  That is ridiculous, and not only can you get hurt when the paint can explodes, but you'll be in a ton of trouble with your better half too (not to mention covered with paint!).  So only use hot tap water.  Let the can sit for several minutes to warm up sufficiently.


What this does is to allow the paint mixture to blend thoroughly and it really helps in spraying.  I do this to all my spray paints/primers, and have had excellent results.  You could also leave the paint in the sun on a warm day for several minutes, as this will also work during warm months (obviously between Spring-Fall).


Prime that shell!


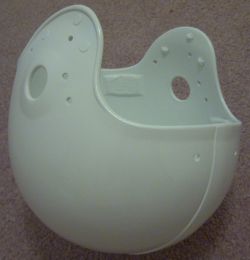
You can do like I do and start by priming the inside of the shell, but you don't have to.  I like to use white primers, as the white allows lighter colors to be more easily painted over later without the primer color bleeding through.  However, you can use regular old gray primer, or the red primers, as dark finish colors will come out just fine over these.  One thing to keep in mind is that you may need to use a darker primer over red- or yellow-colored helmets, as the red or yellow pigments in the plastic will bleed through white (or lighter) primers.  The main purposes for priming are to seal the surface of the shell and to fill minor scratches/blemishes.  If you start with the interior, allow the primer to dry for approximately 20-30 minutes (drying times vary!) and then prime the exterior of the shell.  Don't be afraid to spray it on too heavily, to ensure that small scratches get filled.  If you get a run, no big deal, you can sand it out later after it dries.

After the primer has dried for AT LEAST 72 hours (3 days), look it over and see what you immediately need to sand out.  Even if you sprayed an immaculate primer coat, break out the Wet-and-Dry sandpaper and wet sand the shell with 400-grit and then 600-grit.  Go slowly and check your progress frequently, as the wet-sanding will remove a lot of material in a short time.  Wet sand the ENTIRE shell, to level the primer and eliminate small scratches.  Afterwards, you should see most small scratches disappear.  If not, wash off the shell when you're finished wet-sanding, allow to dry thoroughly, and prime the shell again.  Repeat this process as many times as necessary until either all the scratches are filled in or you just lose patience.  


On to Step 5