Rather buy a new football
helmet instead?

|
|
Got a helmet that you want
to clean up, but don't want or need to go through the whole
painting and reconditioning process? Here are several
quick and easy tips to get that helmet decal and display ready!

First off, a precaution: if you sand or file a helmet shell,
you are removing parts of the shell and will automatically
void the warranty. DO NOT USE THE HELMET FOR ANYTHING
OTHER THAN A DISPLAY MODEL! Some helmet manufacturers
claim that simply applying spray paint to a helmet can cause
it to become brittle; obviously by sanding/filing a helmet
shell you are making the shell weaker. So do not use
it for anything other than display purposes only, in order
to properly protect yourself. To avoid any confusion
with my shells (since they will only be used for display,
and God help the poor fool that tries to use it for anything
otherwise when I get hold of him/her), I sand off the NOCSAE
certification molding on the rear of the shell and remove
all labels but the sizing label inside.
With that said, let's get busy!
|
|
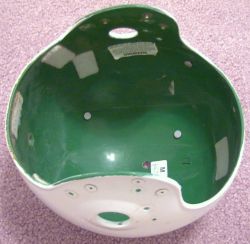 |
Be sure to strip down the helmet,
removing the facemask, cheekpads, snaps, screws, and all inner
pads and liners. On a Riddell helmet with air bladders,
be sure to remove the plastic plug from the outside of the
helmet, and then gently remove the bladder/pads from the inside.
I usually don't worry if I'm going to tear the bladders as
these helmets are going to be used for display only anyway.
Once the shell is stripped down, you may want to remove
existing labels, stickers, and decals. Various methods
can be used, but I usually employ an Xacto knife with a
chisel blade to remove these. For exterior decals,
use a hair dryer to heat the decal and peel it off.
For residual adhesive, use either a Brillo or SOS pad to
scrub off the adhesive, or steel wool with hand cleaner.
You can also use 3M adhesive remover (available from auto
body supply stores) to safely remove the adhesive residue.
|
|
I use either a Brillo or SOS soap-impregnated
pad to scrub out the inside and outside of the shell.
Most of the used helmets I've obtained have not been thoroughly
cleaned, so this is the time to do it. Many pro teams
use SOS & Brillo soap-impregnated pads to clean up their
helmets between each game, as it safely removes paint scuffs
and minor scrapes. It will lightly scuff the surface,
but this is easy to remove.
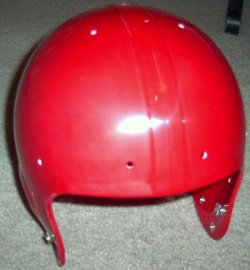
After using the steel wool pads to clean the shell, decide
as to whether or not you want to do any sanding on the shell;
you could just throw a coat of plastic polish on the shell
and reapply decals once the paint scuffs are removed, or
you could sand out some of the finer scratches. I
usually choose to break out the WetAndDry sandpaper to wet-sand
out most of the minor scratches. Starting with 400-grit,
I progress in the following order: 600, 800, 1000, 1200,
1500, 2000, 2500, and 3000-grit paper. With 2000-grit
and higher-grade paper, I sand in back-and-forth motions,
instead of swirls or circles. This ensures a consistent
smoothing effect. It took me less than two hours to
strip this helmet down, and completely sand it, so it's
not that involved of a process. I also washed off
the shell in between each grade of sandpaper to ensure that
the sanding residue was removed.
|
 |
|
 |
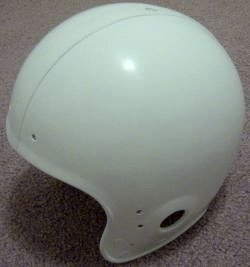
After sanding is completed, and the shell
has had time to dry out, I use 3M Machine Polish to prep the
shell for applying decals. It does not contain silicones
or any other material that might prevent decals from adhering
to the shell, so it is safe to use (unlike waxes, which can
contain silicones or other compounds that may prevent the
decals from adhering). It also accepts paint clear coats
and is a pleasure to use. The results are worth the
effort, as you can tell by looking at the photo to the left.
On the right side of the shell, the polish has been applied
and buffed to a great shine. You could also use Novus
Plastic Polish or similar polish to achieve the same effect.
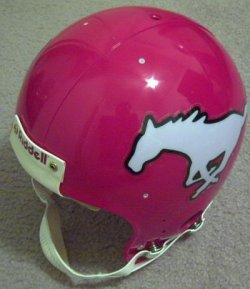
Apply your decals, and finish off the helmet with a coat of
Brillianize
plastic polish or Future Floor Polish for that high gloss
shine! If you don't like the look of the Future, just
wash it off with a mixture of water and a little ammonia (don't
breathe it though). |
|
| The finished product! Not bad for
only a few hours' effort! |
 |
| |
|